
Intrusion Detection System (IDS) watches your actual traffic, matches it against known attack patterns, and alerts you when something looks wrong. Think of it as CCTV for your network instead of just a locked front door.
Snort 3 is one of the best open-source options for this, it’s the same detection engine used in enterprise Cisco deployments, and you can run it for free on a basic Linux box. This guide walks through the full setup from scratch: installation, rules, configuration, and logging.
What You’ll Need
- A Linux machine
- A free account at snort.org
Step 1: Install Snort 3
Install Snort 3 using package manager:
sudo apt install snort
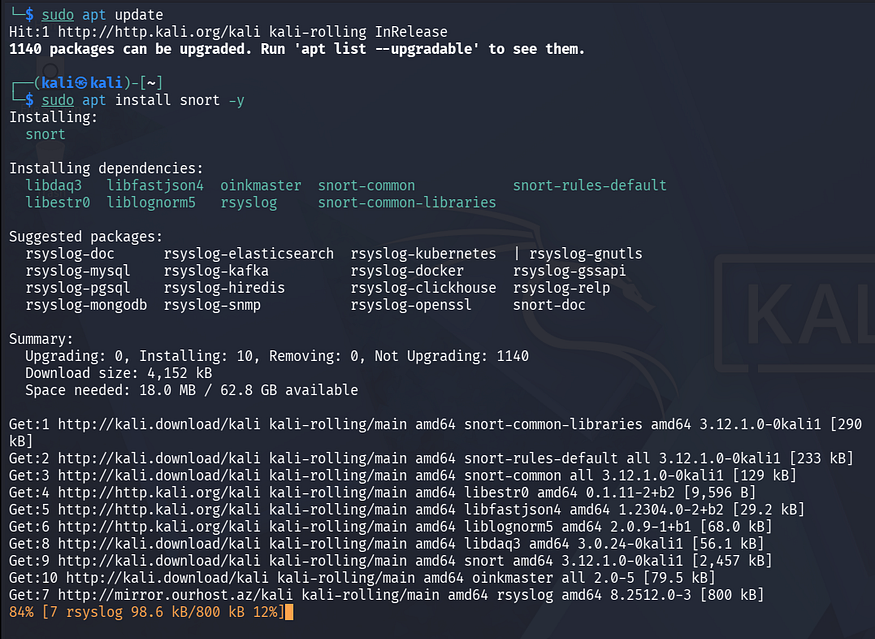
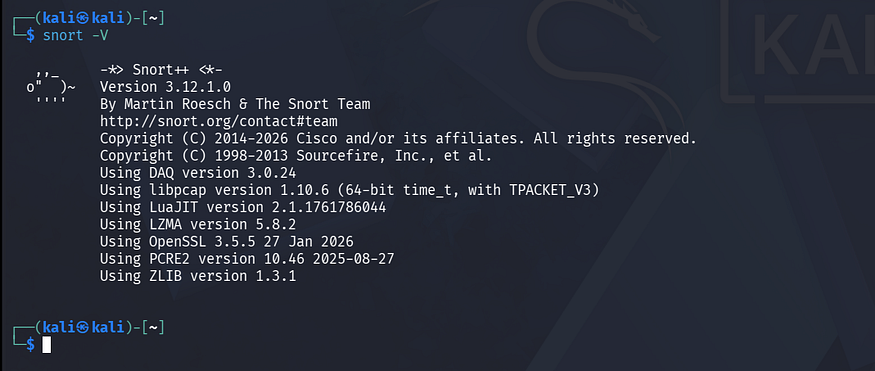
Once it’s done, verify it installed correctly and check the version:
snort --version
Step 2: Create the Rules Directory
Snort expects rules to live at /etc/snort/rules/.
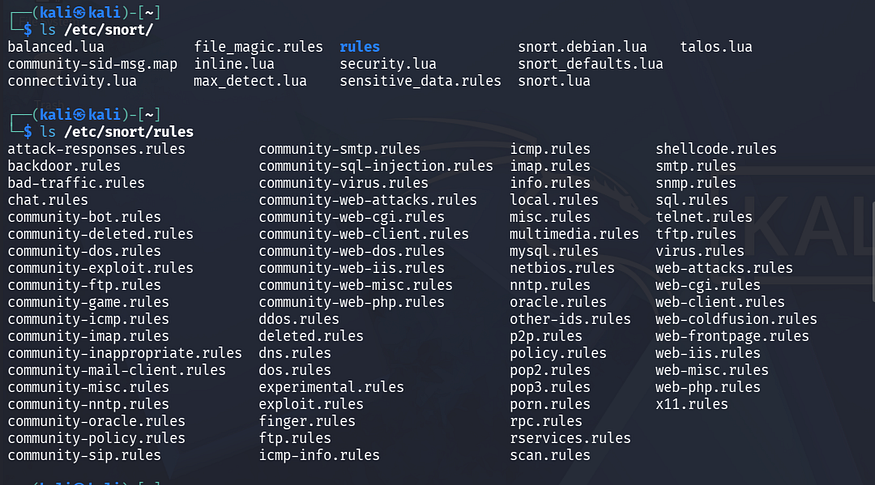
This is where everything goes; community rules, registered rules, and any custom rules you write yourself. It might not exist yet after a fresh install:
sudo mkdir -p /etc/snort/rules
Step 3: Download the Community Rules
Snort ships with a free set of community rules that anyone can grab without registering. Download them directly:
wget https://www.snort.org/downloads/community/snort3-community-rules.tar.gz
Extract and copy the rules into the rules directory:
tar -xvzf snort3-community-rules.tar.gz
sudo cp snort3-community-rules/*.rules /etc/snort/rules/
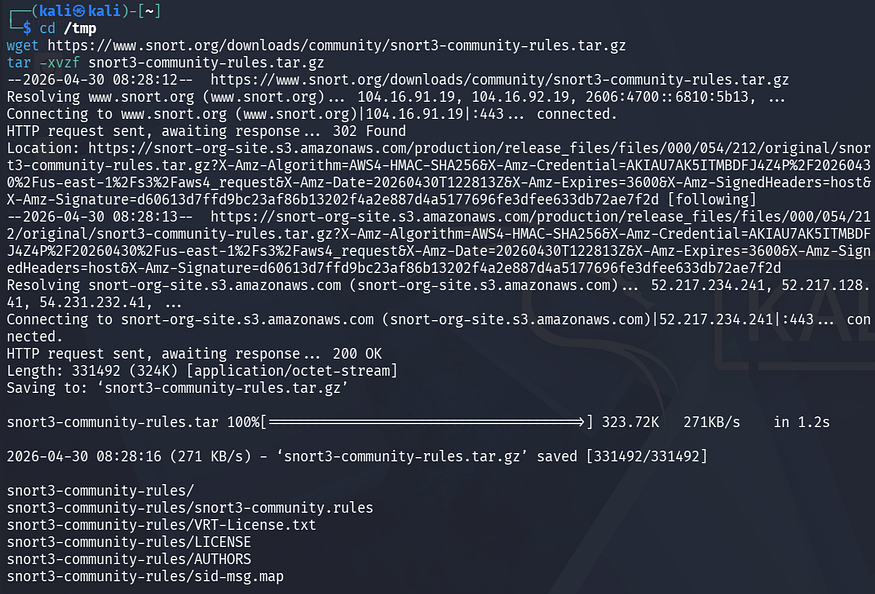
Community rules are a solid baseline. They cover a wide range of known threats and are maintained by the Snort community.
Step 4: Get Your Registered Rules (Free, But Worth It)
Head over to snort.org and create a free account. After signing up, you’ll get an oinkcode(basically a personal token that unlocks the full registered rule set). These rules are maintained by Cisco Talos, one of the best threat intelligence teams out there, and they’re updated regularly.
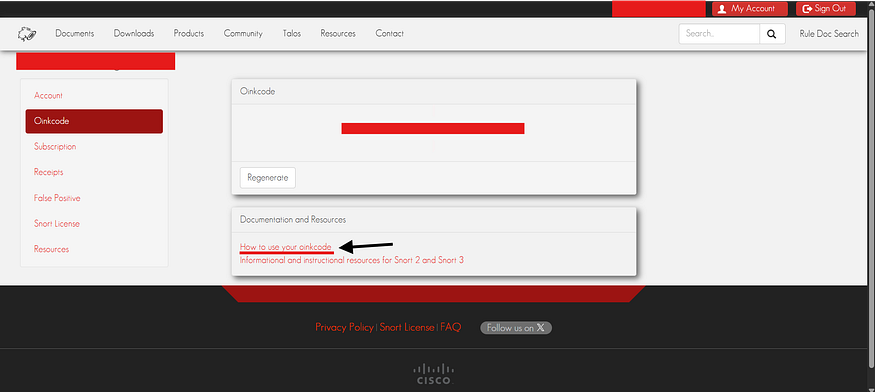
Once you’re logged in and have your oinkcode, go to the rules download page. Click “How to use your oinkcode”, it generates a direct download URL matched to your exact Snort version.
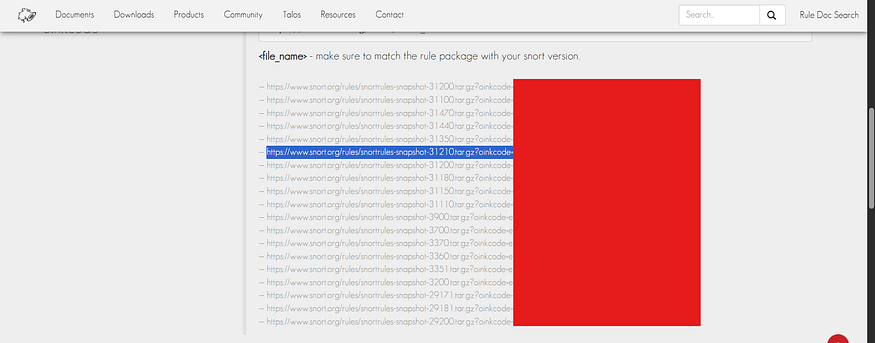
For example, as my version is 3.1.21.0, the archive is named as for my snort version:
snortrules-snapshot-31210.tar.gz
Download it:
wget "https://www.snort.org/rules/snortrules-snapshot-31210.tar.gz?oinkcode=YOUR_OINKCODE_HERE" -O snortrules-snapshot-31210.tar.gz
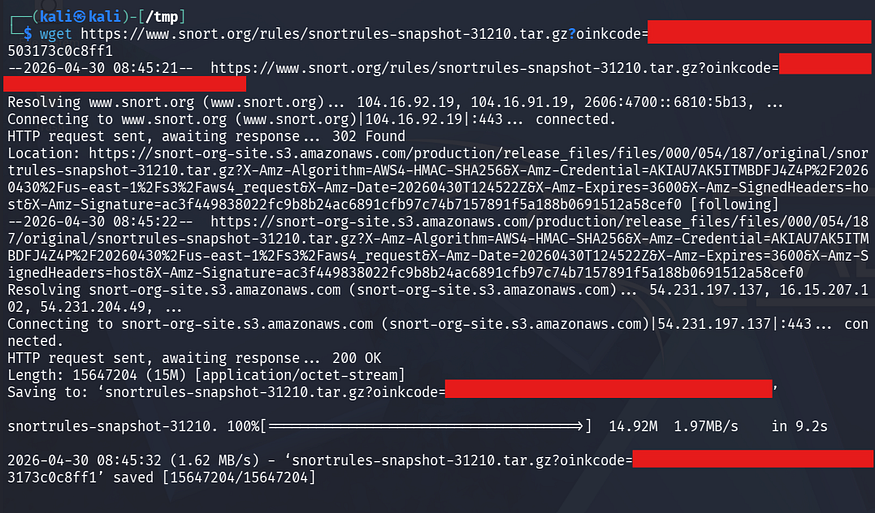
Step 5: Extract and Organize the Rules
Unpack the archive:
tar -xvzf snortrules-snapshot-31210.tar.gz
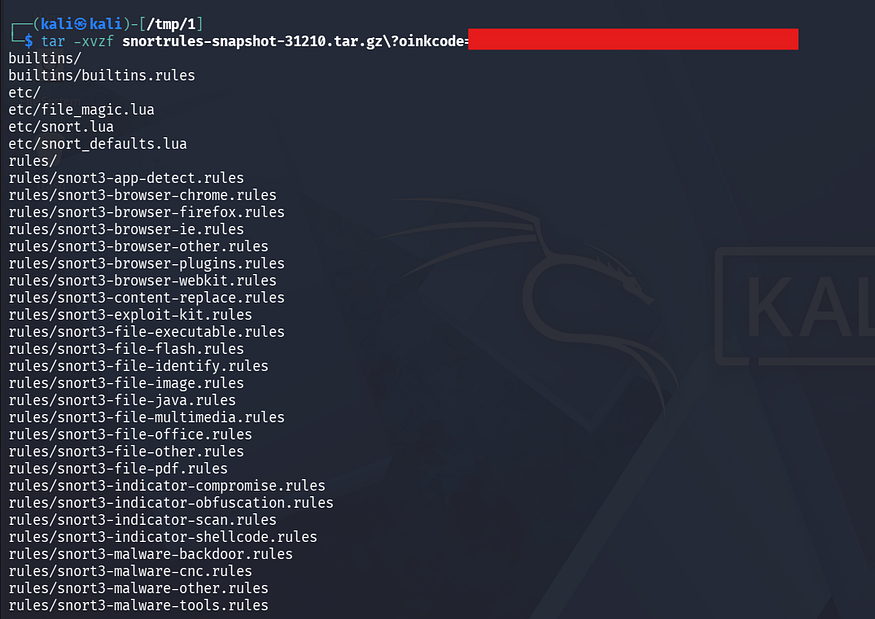
Inside, you’ll find three categories of rules:
rules/— the main rule files (.rulesformat)builtins/— built-in detection logic compiled into Snortso_rules/— shared object rules (binary rules, faster but less transparent)

Copy rules present in each directory into the right place:
sudo cp builtins/* /etc/snort/rules/
sudo cp rules/* /etc/snort/rules/
# So_rules
sudo mkdir /etc/snort/so_rules
sudo cp so_rules/*.so /etc/snort/so_rules/
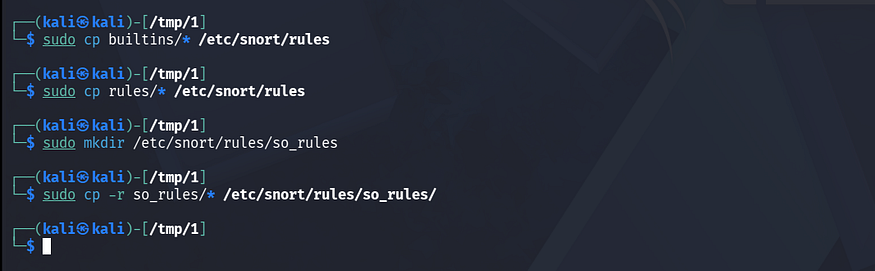
Later, I moved the builtin rules into another directory:
sudo mkdir /etc/snort/rules/builtin_rules
sudo cp builtins/* /etc/snort/rules/builtin_rules/
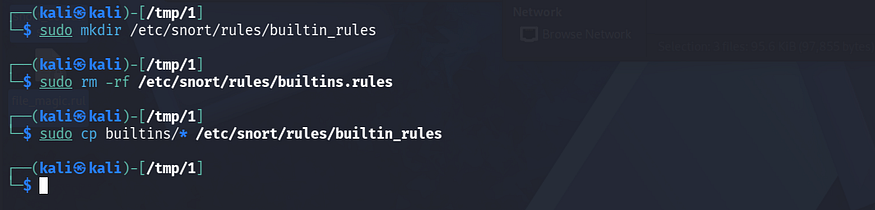
Now, as we have downloaded the rules, we will move forward Snort configuration.
Step 6: Set the Rule Paths in snort_defaults.lua
Snort 3 ditched the old .conf format and moved to Lua-based config files. Open snort_defaults.lua:
sudo nano /etc/snort/snort_defaults.lua
Find the path variables and point them at your rules directories:
RULE_PATH = '/etc/snort/rules'
BUILTIN_RULE_PATH = '/etc/snort/rules/builtin_rules'
PLUGIN_RULE_PATH = '/etc/snort/so_rules'
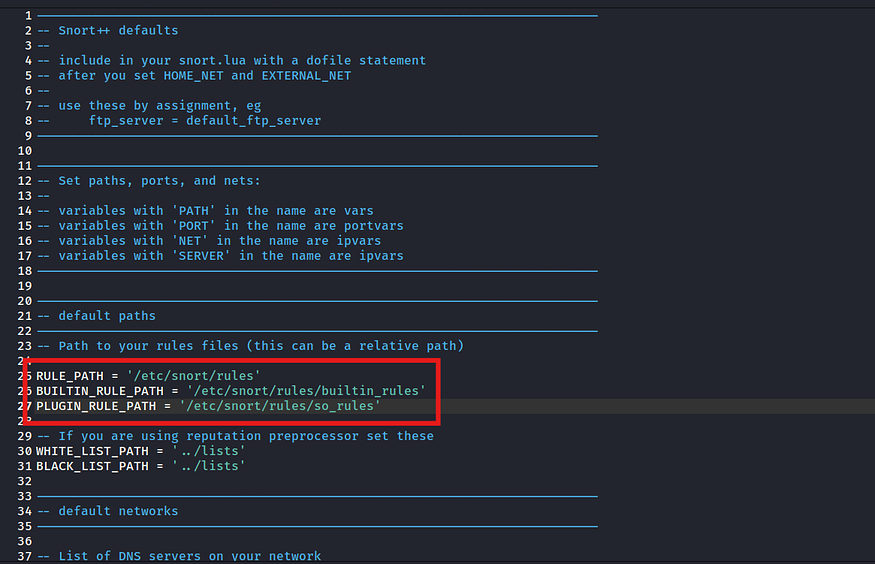
These variables are referenced throughout the config, so setting them here means you don’t have to repeat full paths everywhere else.
Step 7: Include the Rule Files in snort.lua
Now open the main Snort config file:
sudo nano /etc/snort/snort.lua
Scroll to the ips section and add your rule includes. Add these to your snort.lua:
enable_builtin_rules = true,

rules = [[
include $RULE_PATH/snort3-app-detect.rules
include $RULE_PATH/snort3-browser-chrome.rules
include $RULE_PATH/snort3-browser-firefox.rules
include $RULE_PATH/snort3-browser-ie.rules
include $RULE_PATH/snort3-browser-other.rules
include $RULE_PATH/snort3-browser-plugins.rules
include $RULE_PATH/snort3-browser-webkit.rules
include $RULE_PATH/snort3-community.rules
include $RULE_PATH/snort3-content-replace.rules
include $RULE_PATH/snort3-exploit-kit.rules
include $RULE_PATH/snort3-file-executable.rules
include $RULE_PATH/snort3-file-flash.rules
include $RULE_PATH/snort3-file-identify.rules
include $RULE_PATH/snort3-file-image.rules
include $RULE_PATH/snort3-file-java.rules
include $RULE_PATH/snort3-file-multimedia.rules
include $RULE_PATH/snort3-file-office.rules
include $RULE_PATH/snort3-file-other.rules
include $RULE_PATH/snort3-file-pdf.rules
include $RULE_PATH/snort3-indicator-compromise.rules
include $RULE_PATH/snort3-indicator-obfuscation.rules
include $RULE_PATH/snort3-indicator-scan.rules
include $RULE_PATH/snort3-indicator-shellcode.rules
include $RULE_PATH/snort3-malware-backdoor.rules
include $RULE_PATH/snort3-malware-cnc.rules
include $RULE_PATH/snort3-malware-other.rules
include $RULE_PATH/snort3-malware-tools.rules
include $RULE_PATH/snort3-netbios.rules
include $RULE_PATH/snort3-os-linux.rules
include $RULE_PATH/snort3-os-mobile.rules
include $RULE_PATH/snort3-os-other.rules
include $RULE_PATH/snort3-os-solaris.rules
include $RULE_PATH/snort3-os-windows.rules
include $RULE_PATH/snort3-policy-multimedia.rules
include $RULE_PATH/snort3-policy-other.rules
include $RULE_PATH/snort3-policy-social.rules
include $RULE_PATH/snort3-policy-spam.rules
include $RULE_PATH/snort3-protocol-dns.rules
include $RULE_PATH/snort3-protocol-finger.rules
include $RULE_PATH/snort3-protocol-ftp.rules
include $RULE_PATH/snort3-protocol-icmp.rules
include $RULE_PATH/snort3-protocol-imap.rules
include $RULE_PATH/snort3-protocol-nntp.rules
include $RULE_PATH/snort3-protocol-other.rules
include $RULE_PATH/snort3-protocol-pop.rules
include $RULE_PATH/snort3-protocol-rpc.rules
include $RULE_PATH/snort3-protocol-scada.rules
include $RULE_PATH/snort3-protocol-services.rules
include $RULE_PATH/snort3-protocol-snmp.rules
include $RULE_PATH/snort3-protocol-telnet.rules
include $RULE_PATH/snort3-protocol-tftp.rules
include $RULE_PATH/snort3-protocol-voip.rules
include $RULE_PATH/snort3-pua-adware.rules
include $RULE_PATH/snort3-pua-other.rules
include $RULE_PATH/snort3-pua-p2p.rules
include $RULE_PATH/snort3-pua-toolbars.rules
include $RULE_PATH/snort3-server-apache.rules
include $RULE_PATH/snort3-server-iis.rules
include $RULE_PATH/snort3-server-mail.rules
include $RULE_PATH/snort3-server-mssql.rules
include $RULE_PATH/snort3-server-mysql.rules
include $RULE_PATH/snort3-server-oracle.rules
include $RULE_PATH/snort3-server-other.rules
include $RULE_PATH/snort3-server-samba.rules
include $RULE_PATH/snort3-server-webapp.rules
include $RULE_PATH/snort3-sql.rules
include $RULE_PATH/snort3-x11.rules
include $RULE_PATH/community-ftp.rules
include $RULE_PATH/community-icmp.rules
include $RULE_PATH/community-mail-client.rules
include $RULE_PATH/community-sip.rules
include $RULE_PATH/ddos.rules
include $RULE_PATH/experimental.rules
include $RULE_PATH/local.rules
include $RULE_PATH/x11.rules
]]
The local.rules file at the bottom is where you can write your own custom detection rules later.
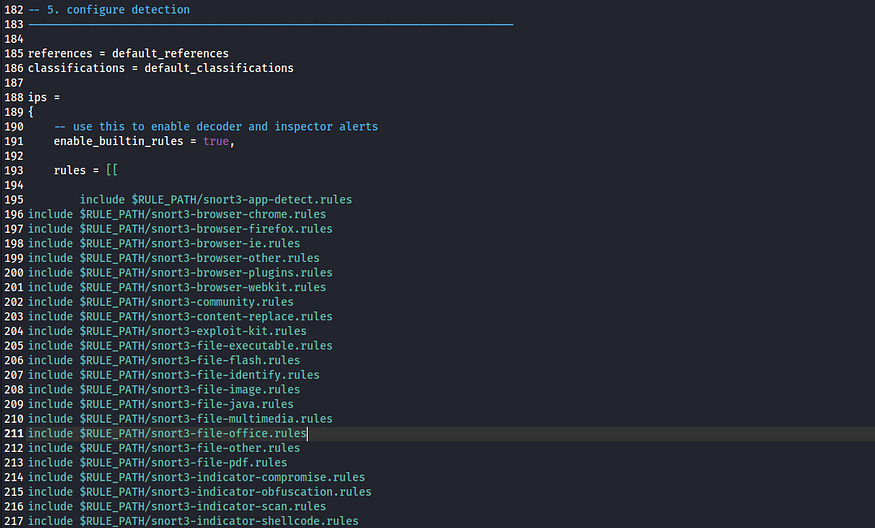
First i copy all the names of all the rules files and asked an AI agent to give me all the rules in the below format and I pasted it in the snort.lua file.
include $RULE_PATH/<rule-name>.rules
A heads-up: not all rule files will load cleanly without errors. Before dumping in every file, you can run a quick test to see which ones cause issues:
sudo snort -c /etc/snort/snort.lua -T 2>&1 | grep "ERROR:" | awk -F: '{print $2}' | sort -u
Run this after adding files. Skip any rules that produce errors; Snort won’t start if even one file has a syntax problem.
Step 8: Set Up Logging
Snort doesn’t write alerts anywhere unless you tell it where and how. Add this to snort.lua:
output = { logdir = "/var/log/snort" }
alert_fast = { file = true }
alert_json = { file = true }
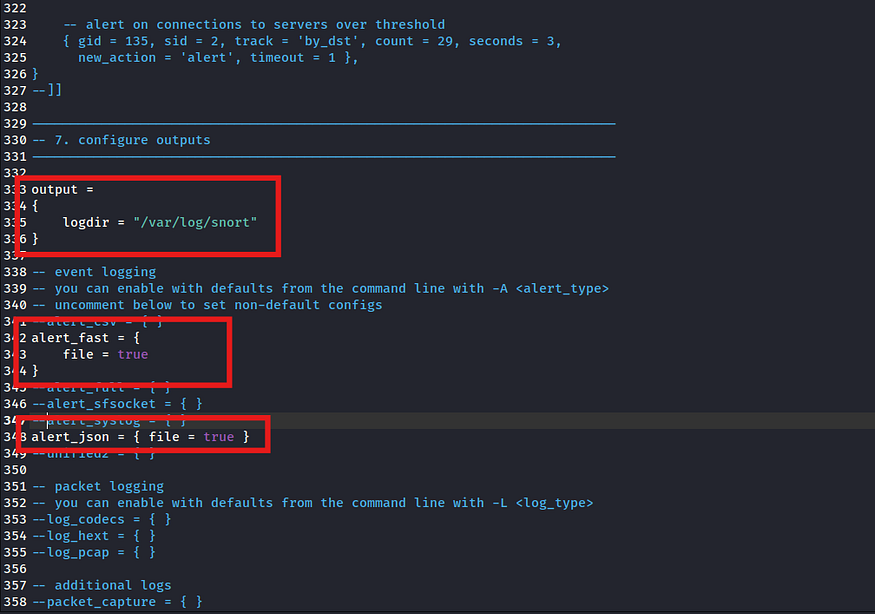
Two formats on purpose:
alert_fastis human-readable — you can justtail -fthis file and read what’s firingalert_jsonis structured JSON — if you ever want to feed alerts into a SIEM like Wazuh or Elastic, this is what you’ll point it at
Create the log directory if it doesn’t exist:
sudo mkdir -p /var/log/snort
Step 9: Test Before You Run
Always test the config before going live:
sudo snort -c /etc/snort/snort.lua -T
A clean test ends with:
Snort successfully validated the configuration (with 0 warnings).
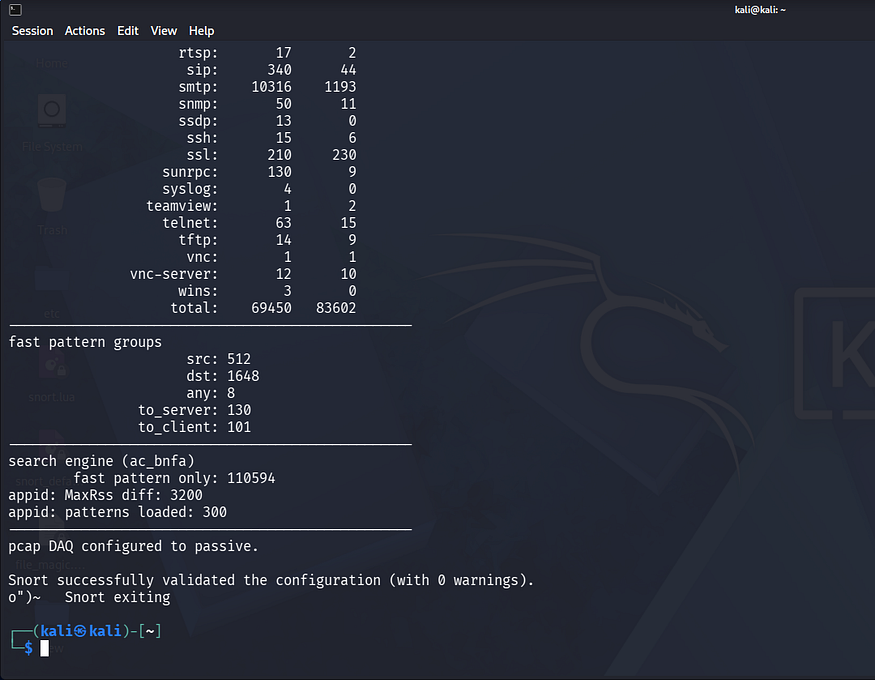
If you see errors, that grep command from Step 7 is your friend. Identify the broken rule files, remove them from snort.lua, and test again. Sometimes it takes a few rounds and that’s normal.
Step 10: Run Snort
Start Snort on your network interface (replace <network_interface> with your actual interface):
sudo snort -c /etc/snort/snort.lua -i <network_interface> -D
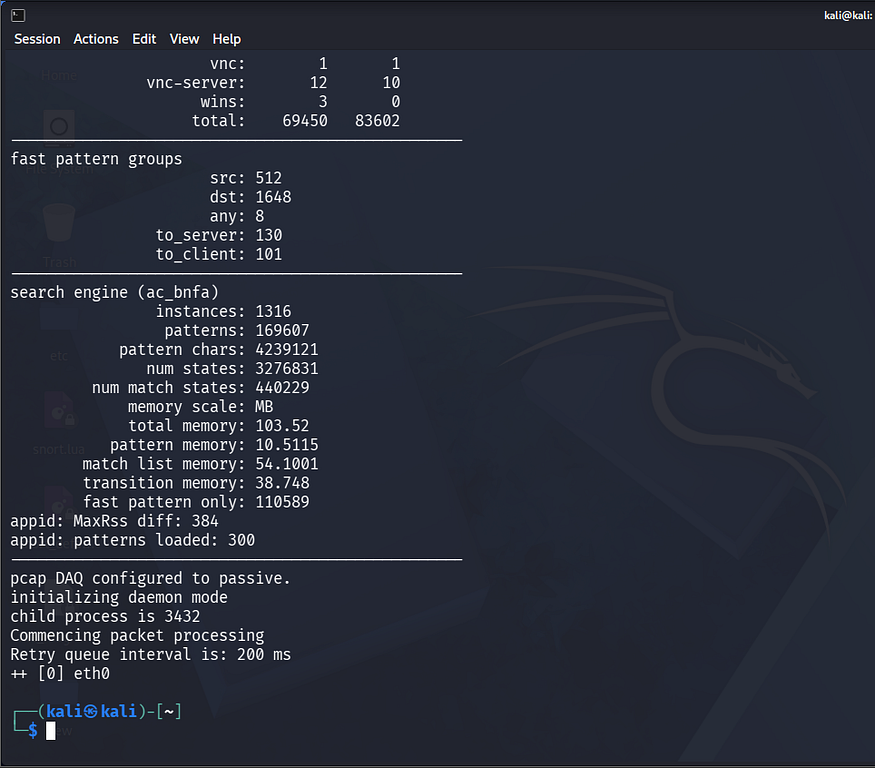
The -D flag runs it in the background. Snort will start inspecting traffic and writing alerts to /var/log/snort/.
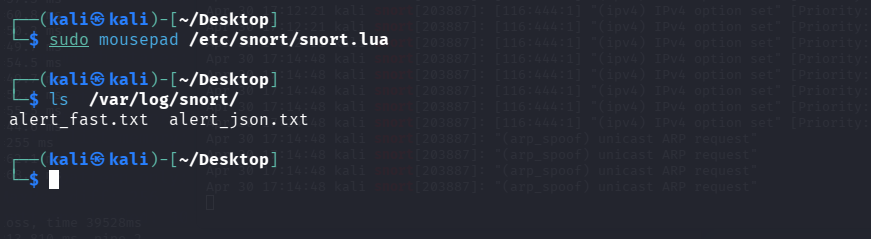
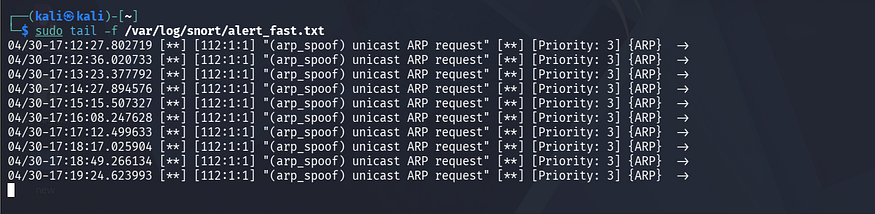
Watch alerts as they come in:
sudo tail -f /var/log/snort/alert_fast.txt
What’s Next
This setup gives us a working IDS with solid rule coverage. A few things worth doing from here:
Automate rule updates. The Snort rule set is updated regularly. Consider a cron job or a tool like PulledPork 3 to keep your rules current.
Forward logs to a SIEM. The JSON log format from alert_json is designed for this. If you’re running Wazuh, point its agent at /var/log/snort/alert_json.txt and you get Snort alerts showing up in the Wazuh dashboard.
Consider moving to IPS mode. Snort 3 can also work in inline mode as an Intrusion Prevention System, actively blocking traffic that matches rules — not just alerting on it.
Final Thoughts
The install itself isn’t complicated once you understand the structure: get Snort, get the rules, tell Snort where the rules are, configure logging, test, run. Each step has a clear reason behind it.
If certain rule files are throwing errors for you in Step 7, drop them in the comments with your Snort version. It’s a common issue and worth documenting which files are consistently problematic across versions.
Found this useful? Follow for more hands-on security and infrastructure guides.
Leave a Reply